How to Take Great Travel Photos With iPhone
Travel photos feel strongest when they capture real moments instead of staged scenes. An iPhone supports this approach because it stays ready, reacts quickly to light, and fits naturally into any trip. That balance makes iPhone travel photography practical for cities, landscapes, and everyday details you notice along the way.
This article explains how to take good travel photos with iPhone using simple habits, clear composition choices, and eight practical tips that work on any journey.
8 Practical Tips to Improve Your iPhone Travel Photos
We have put together eight practical tips on how to take better travel photos with an iPhone. We rely on methods that we used ourselves over the years during real trips. These habits work in busy cities, small towns, coastal roads, and quiet landscapes. They can help you improve your travel photos and maintain consistency from one journey to the next.
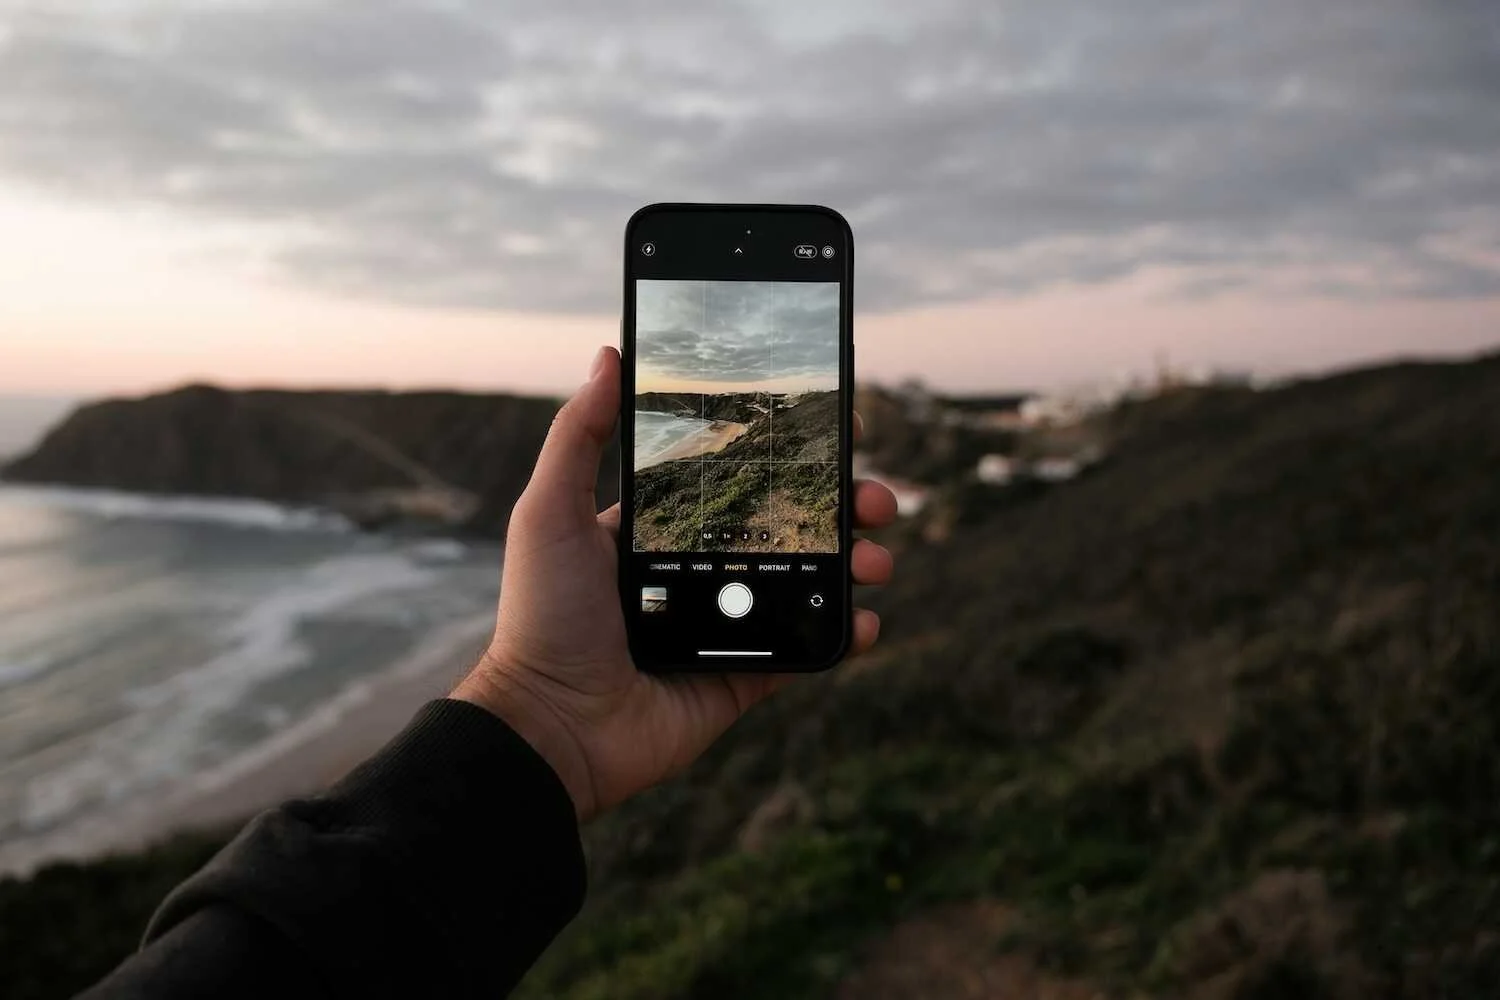
1. Choose Mobility Over Gear
Mobility sets the foundation for every travel photo. With the first tip, we start from movement, speed, and quick access, since these factors influence results more than most camera settings. This approach supports many practical iPhone photography tips and works well in real travel conditions.
How to apply this tip in practice:
Carry only your iPhone. Leave extra lenses, grips, and accessories behind unless a clear need exists. Fewer items reduce setup time and allow a faster response to changes around you.
Keep the camera easy to reach. Hold the phone in your hand or place it in a pocket instead of a bag. Quick access often decides whether you capture a moment or miss it.
Move closer instead of using Zoom. Walk toward the subject rather than rely on Zoom. This preserves image quality and improves perspective.
Pause briefly before the shot. Take one second to check the background, frame edges, and light direction. This short pause often turns an average frame into a strong travel photo.
Why this tip works: When movement stays free, and access stays instant, timing improves naturally. You notice light sooner, react faster to people and details, and miss fewer moments. This habit alone often leads to better travel photos with the iPhone before any other adjustment enters the process.
2. Watch Your iPhone Storage During Trips
Available memory has a direct effect on how the iPhone camera behaves during travel. When free space drops too low, the device may delay photo saving, interrupt video recording, or respond more slowly when you press the shutter. Apple explains that low available storage can cause performance slowdowns across system features and recommends checking storage and freeing space when issues appear, as outlined in Apple Support guidance.
A clean photo library helps the camera stay fast and predictable throughout the trip. When space starts to disappear mid-day, a free iPhone cleaning app such as Clever Cleaner offers a quick way to restore memory without manual sorting. The app detects duplicate and similar photos with one tap, highlights the strongest shot automatically, finds heavy files, compresses Live Photos, removes screenshots instantly, and clears space through simple swipe actions. No ads, subscriptions, or hidden limits interrupt the process, which makes it useful during busy travel days.
Why this tip works: Free storage keeps the camera responsive when timing matters most. Photos save without delay, video recording stays stable, and the device reacts instantly to light or movement. This reliability helps avoid missed shots and keeps travel photography smooth throughout the trip.
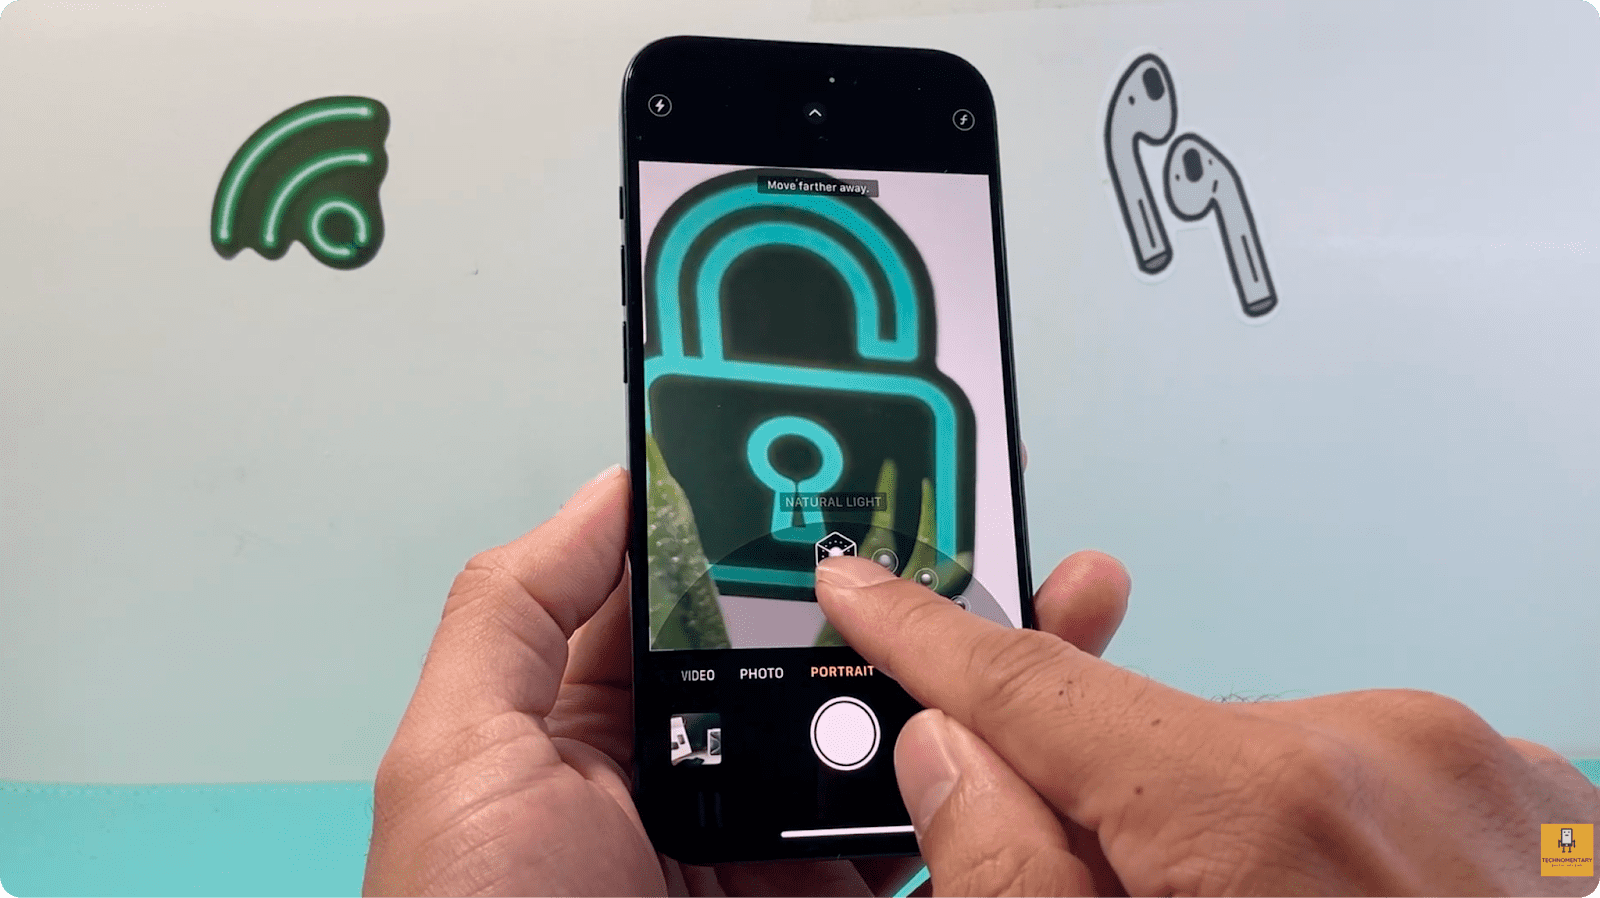
3. Use Natural Light to Shape the Scene
We recommend natural light as the main reference point for travel photos on iPhone. In real travel situations, light direction and strength affect contrast, color, and depth more than camera modes or later edits. A small position change often produces a better result than any adjustment after the photo appears.
For stable results, let the camera measure light from the subject rather than the background. Tap the main subject on the screen so the camera locks exposure in the correct place. When bright skies or reflective surfaces dominate the frame, lower exposure slightly with the on-screen control to protect highlights and keep detail visible. This effect matches real iPhone camera behavior shown in a visual demonstration of natural light use on iPhone.
Light direction also affects how the scene appears. Side light adds texture to faces, buildings, and objects, while flat front light removes depth. One step to the left or right often changes how the photo looks on screen. A shorter distance to the subject helps separate it from the background, even without Portrait mode.
Indoors, natural light from windows provides the cleanest result. Place the subject close to the light source and avoid mixed light from ceilings and lamps. This setup keeps tones consistent and reduces harsh shadows. Careful work with light at this stage lowers the number of unusable shots and reduces the chance that photo recovery becomes necessary after the trip.
This method supports strong iPhone photos across different locations. When light looks balanced on screen, framing feels simpler and post-shot changes stay minimal.
Why this tip works: Light defines how the camera records detail, contrast, and color before any setting applies. When light falls correctly on the subject, the sensor captures more usable information, shadows stay controlled, and highlights do not clip. This reduces exposure errors at the source and prevents quality loss that no edit can fully fix later.
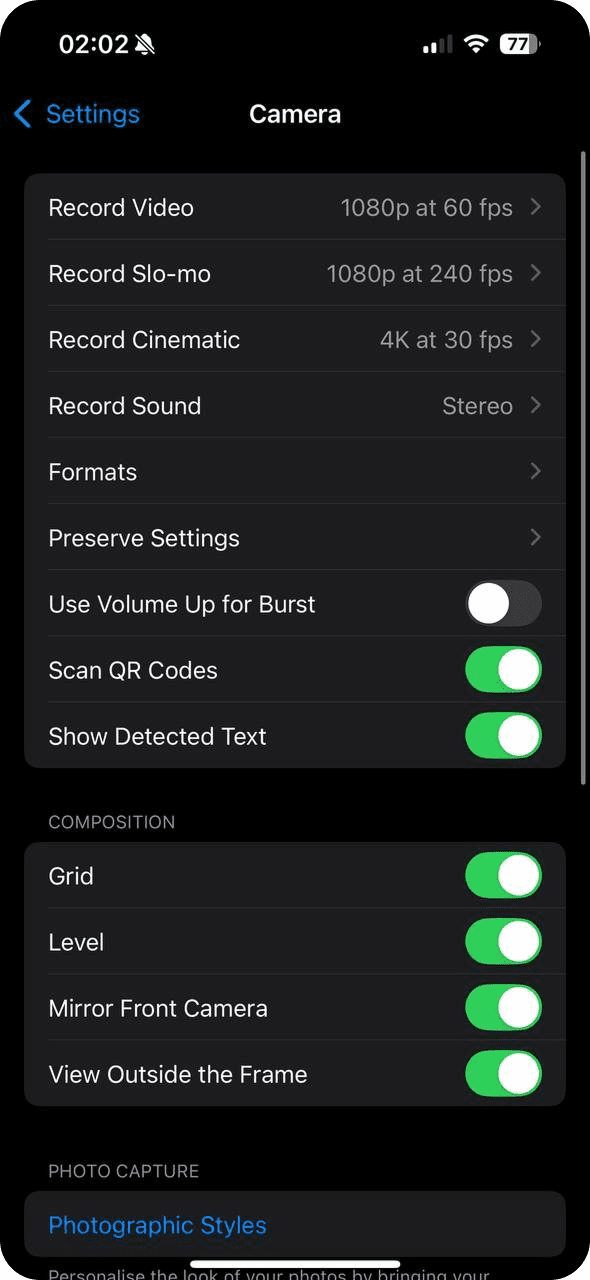
4. Use the Grid for Clean and Balanced Frames
A clean frame improves travel photos more than most edits. We recommend the grid as a simple on-screen guide that helps control balance, horizon level, and subject placement. This habit plays a direct role in better iPhone photos across cities, landscapes, and interiors.
How to apply this tip in practice:
Turn on the grid in Camera settings. Open Settings, select Camera, then enable Grid. Three horizontal and vertical lines appear on the camera screen.
Align the horizon with grid lines. Place the horizon along one of the horizontal lines instead of the center of the frame. This keeps landscapes and city views visually stable.
Place the main subject away from the center. Position the subject near an intersection point of the grid lines. This adds balance and gives the scene more space.
Check frame edges before you tap the shutter. Scan the edges for cut signs, poles, hands, or objects that distract from the scene. A small shift often removes these issues.
Keep vertical lines straight. For buildings and street scenes, align walls or poles with the vertical grid lines. This prevents a tilted look and keeps the architecture natural.
Why this tip works: The grid serves as a visual guide that stays consistent in every location. It reduces framing mistakes, improves balance, and limits the need for later cropping. With this habit in place, travel photos look cleaner at the moment of capture and stay consistent from trip to trip.
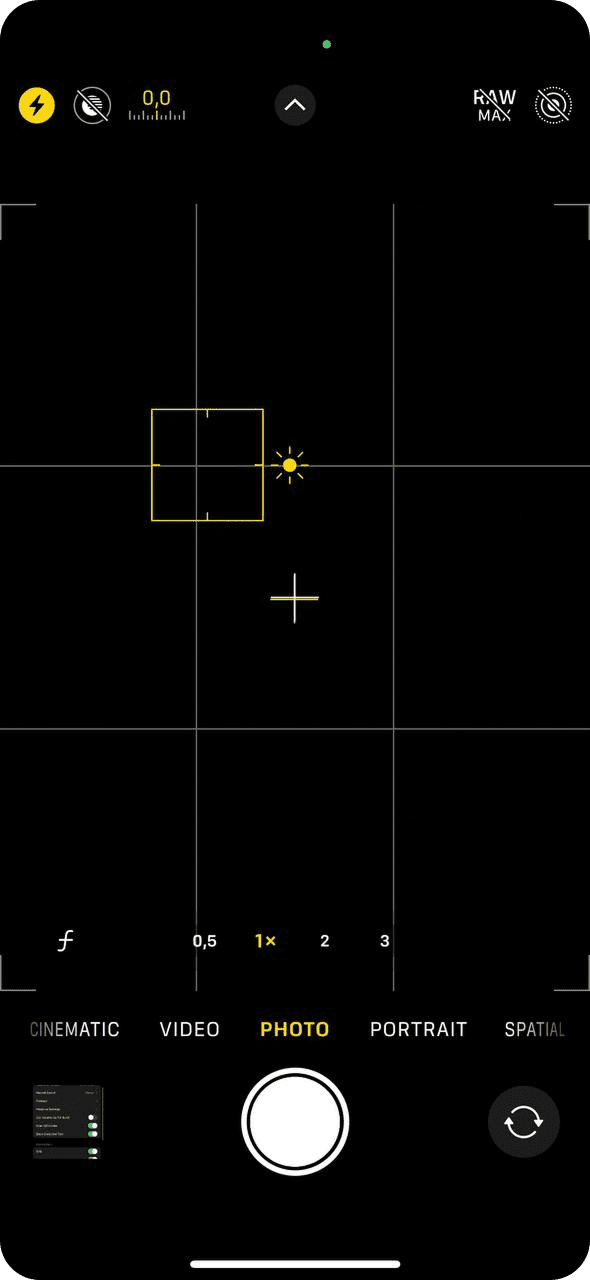
5. Control Exposure Manually Instead of Trusting Auto
Based on our experience with iPhone travel photography, auto exposure often reacts to overall brightness instead of the most important part of the scene. In locations with bright skies, reflections, or mixed light, this behavior leads to lost detail and uneven results. Manual exposure control keeps key areas visible and prevents sudden brightness shifts at the moment of capture.
This observation matches how many photographers describe real situations in photography discussions on Reddit about auto versus manual control, where users point out that automatic modes work in simple scenes, but manual exposure delivers more predictable results once contrast increases or light conditions change fast. These shared experiences confirm that exposure control plays a critical role during travel, where scenes change quickly and moments rarely repeat.
Why this tip works: Exposure determines how much usable image data the sensor records at capture time. Manual control protects highlights and shadows before quality loss appears, which preserves detail that later edits cannot fully rebuild.
6. Protect Photos with iCloud and External Storage
During trips, iPhone photo libraries grow fast. Daily shooting, videos, Live Photos, and screenshots increase the risk of loss during cleanup or transfers. One backup method rarely covers all real travel scenarios.
iCloud provides automatic cloud backup and works well as the first protection layer. It saves photos in the background and allows recovery after device issues or accidental deletion. At the same time, cloud sync depends on internet access and available storage, which may fail during long trips or unstable connections.
An external flash drive adds a second safety layer. iPhone-compatible USB or Lightning drives allow direct photo copies without a computer and work offline. This option gives full control over selected files and protects images even when cloud sync pauses or errors appear.
Still, things can go wrong, but you should know that it’s sometimes still possible to get those lost photos back. Whether they vanished during a file transfer or got wiped in a cleanup, there’s often a way to recover them. That’s where a solid guide on recovering deleted iPhone photos becomes part of a complete backup strategy.
Why this tip works: iCloud and a flash drive protect photos from different risks. Cloud backup handles automation, while local storage provides direct control. Together, they reduce the chance of permanent photo loss during travel.
7. Use Motion and Timing to Add Life to Photos
Travel scenes rarely stay still. Streets change each second, people move through light, vehicles pass, and weather shifts fast. Based on our experience, the answer to how to take good travel photos with an iPhone often depends on the right moment rather than perfect framing, especially in active locations.
The iPhone camera handles motion better than many users expect. Burst mode records several frames within a single second, which gives multiple moment choices instead of one attempt. This option proves useful in crowded streets, transit areas, or markets, where scenes shift before a second photo becomes possible.
How to enable and use Burst mode on iPhone:
Open the Camera app. Make sure Photo mode is active.
Press and hold the shutter button. Touch and hold the shutter button. The camera starts a burst sequence and shows a frame counter on the screen.
Select the best frame. Open the photo series in the Photos app, tap Select, and choose the strongest image from the set.
Instead of moving the camera with the subject, set the frame first and wait. When a person enters the scene at the right distance or light zone, the moment aligns naturally. This method keeps motion clear and avoids visual clutter from random elements across the frame.
Photos that include motion often carry higher value within a travel series. Static landmarks appear countless times online, while images that show movement rarely repeat. When such shots disappear during cleanup or transfers, the need to restore deleted photos usually relates to moments with context that cannot be returned.
Why this tip works: Motion adds rhythm, timing, and context that static scenes lack. A photo that captures a brief moment carries stronger visual and emotional value than a still frame taken a second earlier or later.
8. Edit with Restraint and Keep Results Consistent
In the final tip, we address what happens after the photo already exists. Strong results form at capture time, not through heavy edits. Based on our experience, light and consistent adjustments play a key role in how to take great iPhone photos, while aggressive changes often reshape scenes beyond recognition.
On iPhone, small exposure, contrast, and color corrections usually provide enough control. These adjustments keep photos natural and protect image quality that heavy effects tend to damage. Many travelers rely on this approach because it preserves realism and avoids visual distortion.
Consistency across a trip matters more than a unique look for each frame. When photos share a similar tone and brightness, the entire set feels intentional and easier to review or share. This also reduces the need for repeated correction on individual images.
Heavy edits often hide mistakes instead of fixing them. Missed light or poor timing cannot return through filters. Clean capture habits from earlier tips limit later correction and help preserve the true character of each scene.
Why this tip works: Light adjustments protect image detail and visual trust. A consistent look across photos strengthens the travel story and keeps attention on the place rather than on artificial effects.
Final Thoughts and Extra Notes Before Your Trip
And the last thing we want to tell you is this: strong travel photos do not depend on luck or location. They come from repeatable habits that work in real conditions. Timing, light awareness, exposure control, and restraint matter more than settings or effects. When these elements come together, it becomes clear how to take better travel photos without complex tools or constant adjustments. In modern iPhone travel photography, this approach helps keep results consistent from one place to another.
Even with the right habits, issues may still appear during a trip. If a photo looks flat, check exposure before changing colors. If motion shots miss the right moment, use burst mode and select the strongest frame later. If storage fills up faster than expected, remove obvious duplicates and screenshots first to protect important images. If light feels difficult, change position instead of camera settings. A single step often fixes contrast problems.
These additional details rarely stand out on their own, but they often decide whether a moment stays clear or disappears.